Host ASP.NET Core REST API on Azure App Service [Full Tutorial]
Master the full lifecycle of a RESTful service in 2026. This post walks you through creating ASP.NET Core Web API from scratch and deploying it to Azure App Service.

Introduction
Azure App Service is a fully managed Platform as a Service (PaaS) that enables the building and deploying of web applications, RESTful APIs, and mobile backends without managing the underlying infrastructure.
RESTful is an architecture style where a service receives and sends data from and to client applications. The goal of the application is to centralize the data that different client applications can use. ASP.NET Core Web API gives us a powerful, easy-to-use API to achieve these goals.
In this article, we will learn how to create an ASP.NET Core Web API with a sample endpoint and host the sample RESTful API endpoint on Azure using Azure App Service.
Create Sample API Application
Open Visual Studio> Create new project > Select “ASP.NET Core Web API” template > Click on Next
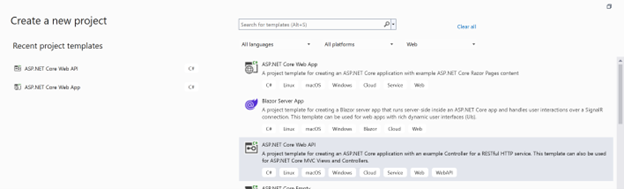
Fig 1: Create an ASP.NET WebAPI Project
Enter project name as “First API App” (Give the name of your preference) > Next
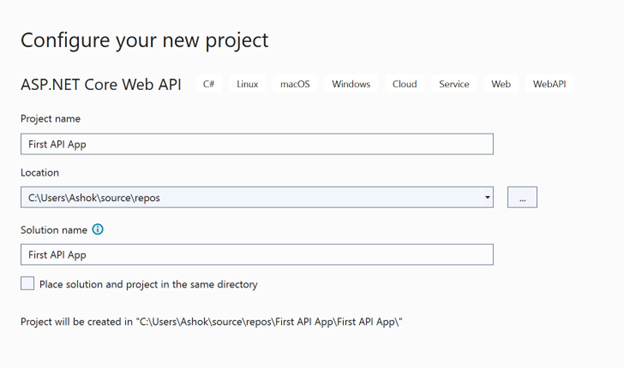
Fig 2 : WebAPI Project – Enter project details
Leave the next page as defaults and click on Create
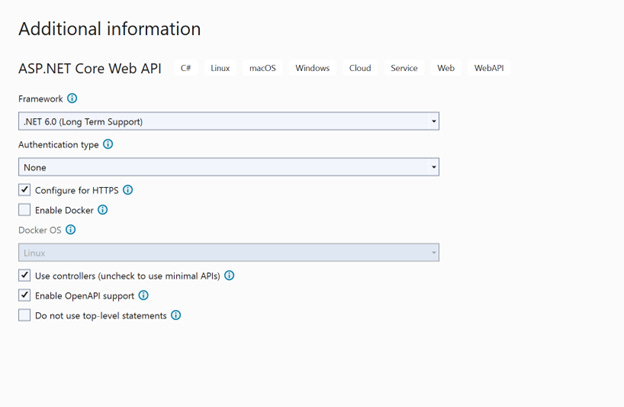
Fig 3: WebAPI Project – Additional details
It creates a solution with WeatherForecast as the default controller, which contains a get method, or else you can add your own controller with get, post, and other HTTP methods. In this case, let’s stick to the default Weather Forecast data.
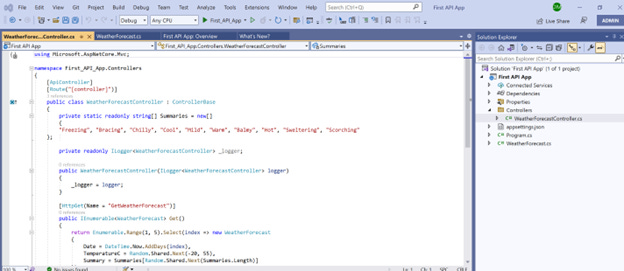
Fig 4 : Default API created as part of Project
Run the solution, and it opens Swagger on localhost, and you can see the Swagger Open API definition and methods. Click on WeatherForecast and the Execute button to get the list of weather data.
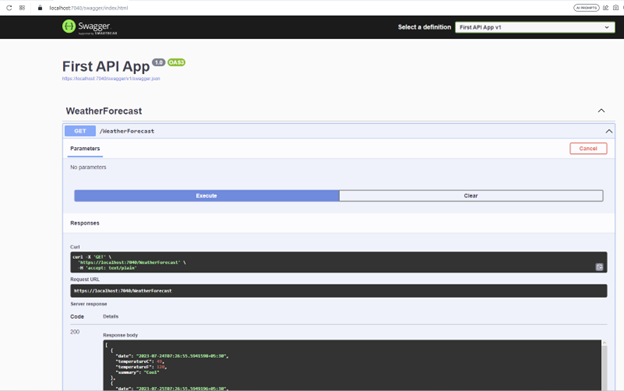
Fig 5: Default API - Swagger local view of Weather data
As the API is working locally, now let’s deploy the API to Azure Web App. From the solution explorer, click on Project > Publish option > Select Target as “Azure”
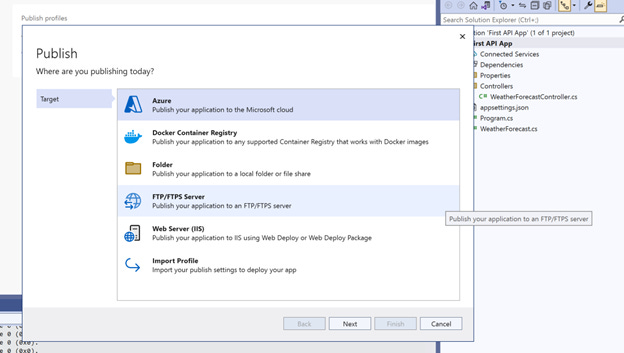
Fig 6 : Publish - Target to Azure
Select Azure App Service (Windows) > Log in with your Azure Account > Click on new > it creates a new App with a hosting plan. Choose the right plan. In this case, I selected the Free service plan(F1) > click on Create > After a few seconds, it creates the App in Azure.
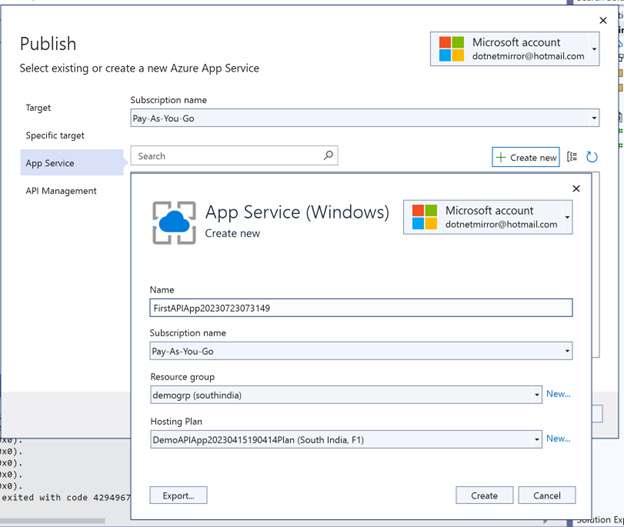
Fig 7: Publish to Azure – Create Service with Plan
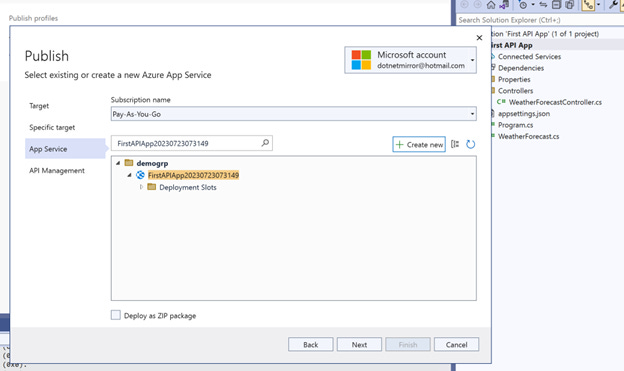
Fig 8: Publish to Azure – Service is created
Skip the API management step and click on OK.
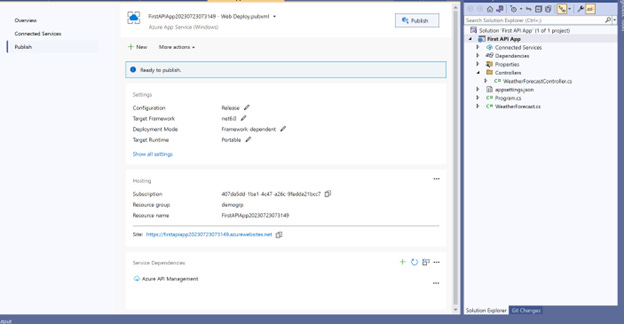
Fig 9 : Publish to Azure – Publish the Application
Now the App is ready with all the settings > click on Publish > It takes some time to deploy the API application and once the deployment is done, App opens in the browser > Sometime you may see a page not found error.
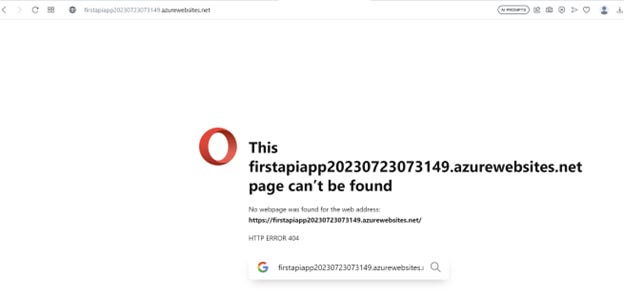
Fig 10: Run App from Azure – default view showing error
But when you browse the API(https://firstapiapp20230723073149.azurewebsites.net/WeatherForecast) directly, it is showing the data, but Swagger is not loading, which means there is a problem with Swagger loading in Azure, and let’s fix it.

Fig 11- Run App from Azure – Direct API view
This error is because by default Swagger is configured to open in the development environment (with in IDE), to work in Azure, comment below if condition code from the AppSettings.cs file from the project code.
if (app.Environment.IsDevelopment())
{
app.UseSwagger();
app.UseSwaggerUI();
}
Redeploy the App to Azure by clicking the publish button again. Now browse the app using URL https://firstapiapp20230723073149.azurewebsites.net/swagger/, and it opens the Swagger definition. Select WeatherForecast Get endpoint and click on execute endpoint, which should result in the data.
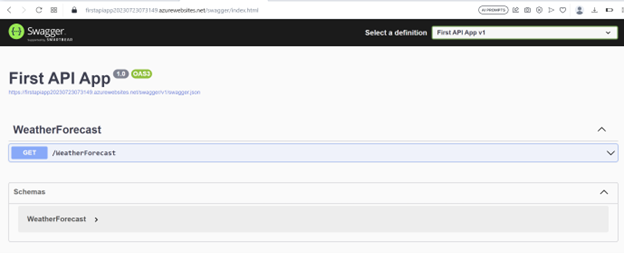
Fig 12: Run App from Azure – Swagger view loaded